Why would you need to VHost?
Sometimes website or system files are added to a server we need to check that they are working correctly, before we make the website live and visible to the general public or client. It’s common to check before making the site live on complex systems as often the server configuration and installed packages can be different on the Live Server vs the Dev Server that it has been tested on, therefore its key to make sure everything is as expected before sharing with a client.
How Does Vhosting and the DNS work?
When you type a URL into your search bar you are essentially telling the browser to go to an address, the address then tells the devices that the website files are held on a x server and provides the IP address of that server. When the browser looks at that server with the entered address, it will serve the correct files.
Now, if you are vhosting, you tell your computer that when ever it looks at X address it must ignore what the DNS says and follow the IP address used in the hosts file.
How to edit a Hosts file on Mac
https://setapp.com/how-to/edit-mac-hosts-file
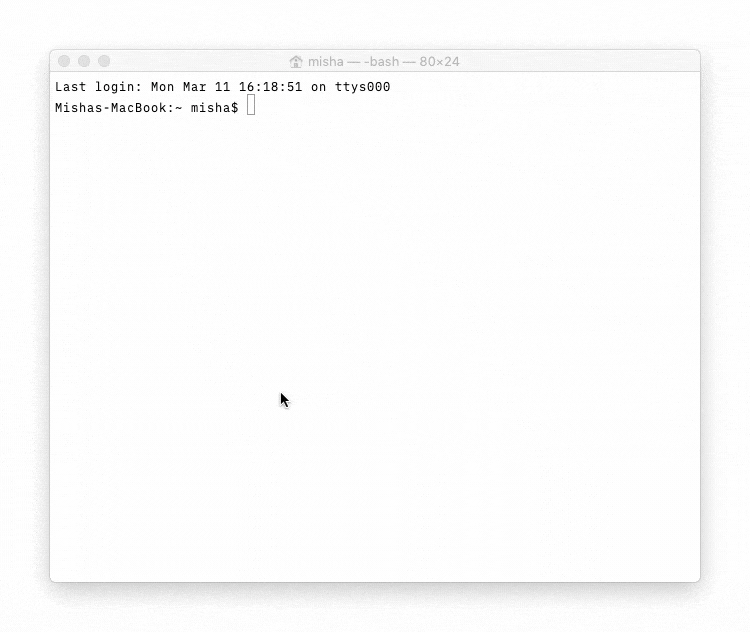
To edit Hosts file Mac features is not a difficult although completely non-obvious process. To open Hosts file on Mac, which is hidden, you need to use Terminal:
- Launch Terminal
- Type the following
sudo nano /etc/hosts3. Enter your admin password
Now you’ll notice you’re in the Nano text editor, from where you can actually edit Mac’s Hosts file. As you can see, some of the TCP/IP addresses are already reflected in here against localhost and broadcasthost titles. All you need to do to input your own TCP/IP is to follow the same format:
Starting with the IP of the server the website has been pushed live to, followed by the www and non www URLS for the ‘live’ URL.
108.128.123.71 www.bramahsafeguarding.org bramahsafeguarding.org 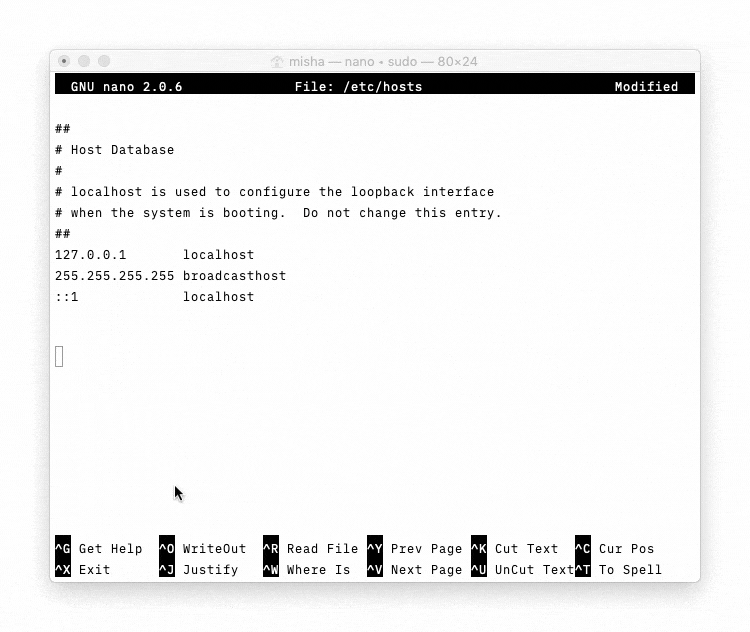
After typing this in, close the editor ( Ctrl X ) and remember to save it (Y) then (Enter)
Then type in the following…
sudo killall -HUP mDNSResponderFollowed by Return to clear your Mac’s DNS cache and prevent any clashes between DNS and the Hosts file.
The changes should take effect immediately. Using the Mac Hosts file this way you can literally input any TCP/IP you need, from other websites to your own development server to your Mac (just type in 127.0.0.1), which can be useful when you want to avoid using social media or other distractions. You could also outright block malicious websites with a 0.0.0.0 address.
How to edit the hosts file in Windows 8, 10 and 11?
Editing the hosts files on all Windows versions is essentially the same – you have to edit the hosts files with Notepad. The only difference is that from Windows 7 onwards, you must run Notepad as an administrator, whereas in older versions (Windows XP and earlier) this is not mandatory.
However regardless of the Windows version, the default Windows host file location is identical, unless you installed the OS in a different partition:
C:\Windows\System32\drivers\etc\hostsOpen Notepad from Windows Menu
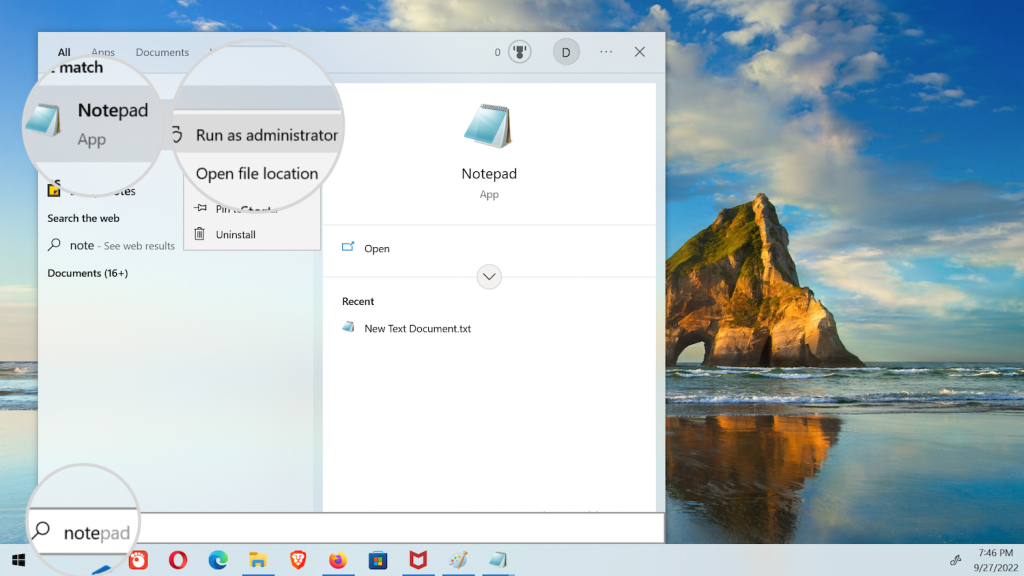
In this guide, we’ll edit the hosts file on Windows 10. To begin with, click on the Windows icon (Start menu).

Start typing Notepad, which automatically enables the search function. The first result will be Notepad. Right-click on the icon and select Run as administrator.
Open the hosts file in Notepad
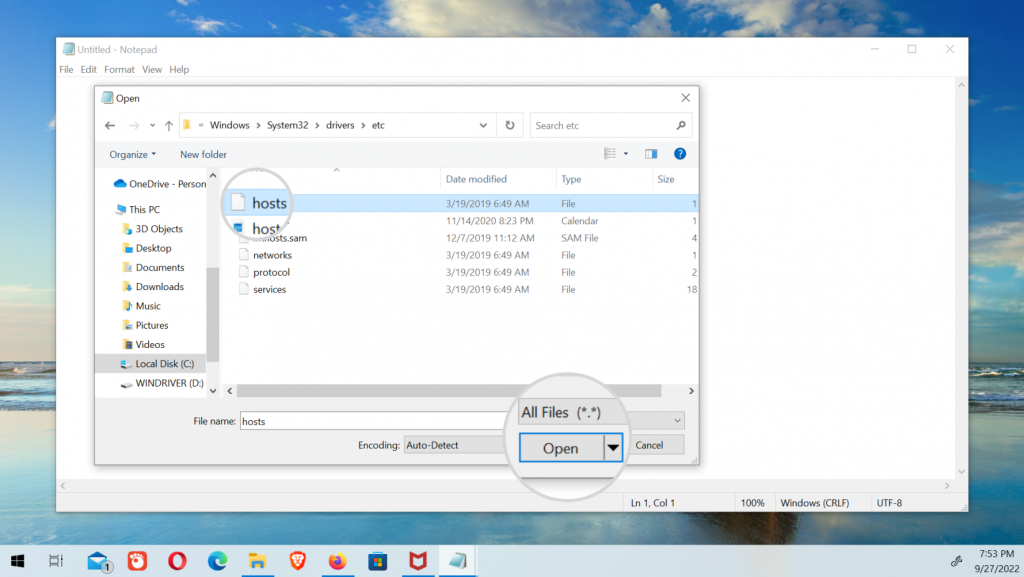
From Notepad’s window, click on the File menu and select Open, which will open a file selector box.
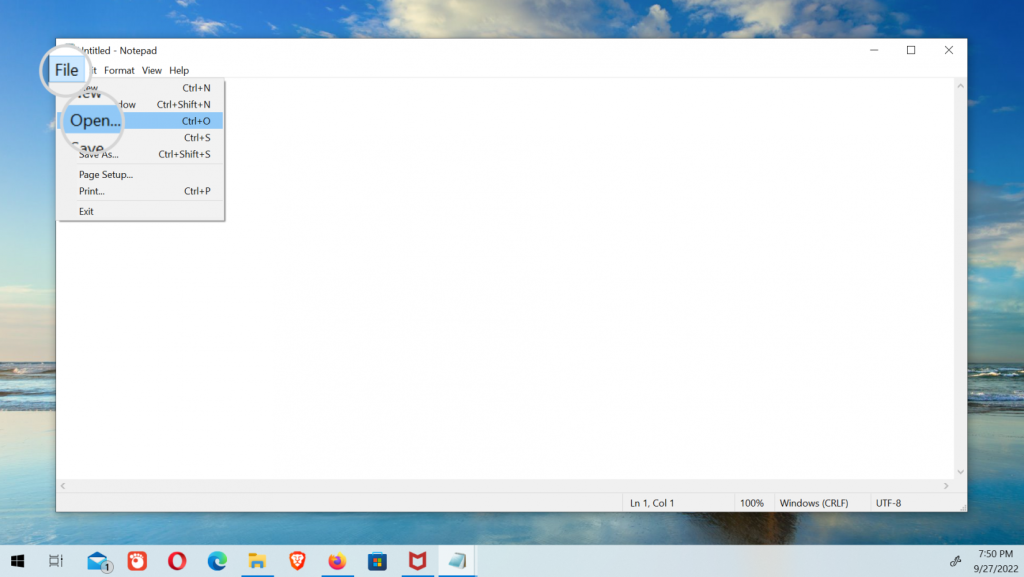
Make sure to select All Files otherwise the hosts file won’t show in the dialogue box as it is a hidden file and doesn’t have a .txt extension. Navigate to the hosts file path, select the file, and press Open.
Edit the hosts file
The Windows 10 hosts file is pretty much the same as on any other operating system. It contains a few lines defining the address for the local host and other services, although it should be noted that they are commented with the “#” symbol. This means that they are not enabled but only left as examples.
To add your custom hostname’s settings, write a new line at the bottom of the file, omitting the “#” symbol.
The new entry should be in the following format:
35.214.215.226 my-new-website.com www.my-new-website.com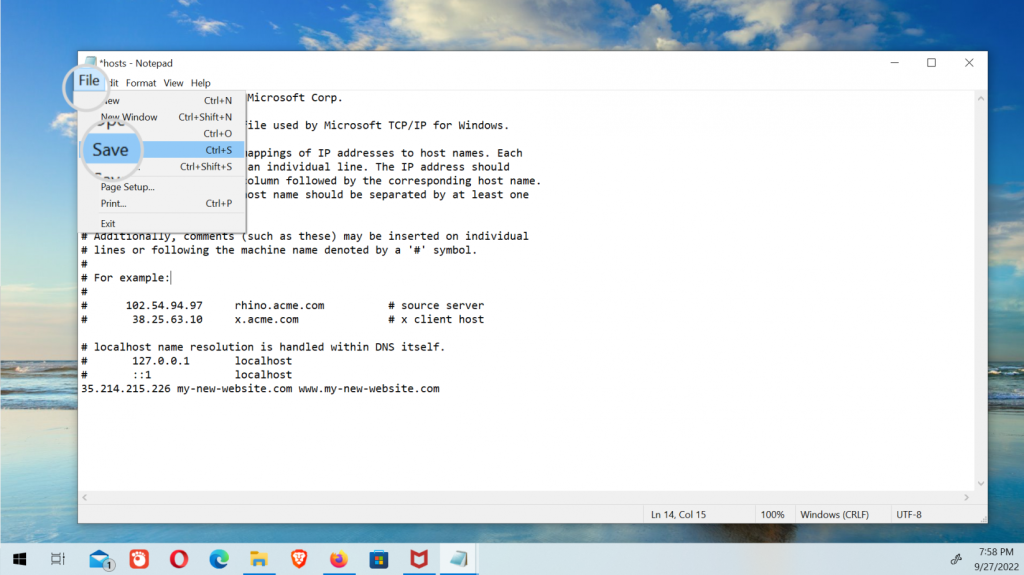
To keep the new changes, save the file with the keyboard shortcut Ctrl + S, or from File menu > Save.